
How We Match Finishes Across Custom Office Furniture
The desk and storage cabinet may both be described as walnut. Place them side by side, however, and one can look warmer, darker or glossier than the other. Add a painted metal frame and upholstered seating, and a single color name tells you very little about how the room will look.
Matching custom office furniture finishes starts with deciding which surfaces should look alike and which should complement each other. The specification then needs to carry that decision from the material selection through sample approval, production and later orders.
At FENLERN, our collections bring desks, storage, tables and seating into a shared design setting. This article explains the finish decisions we work through with buyers and designers. Available materials, sample requirements and acceptance criteria need to be confirmed for each project.
1. Set the Reference and Matching Priorities
First, identify what the furniture needs to match. It might be a selected desktop sample, an existing cabinet, a designer’s material board or a finish from a FENLERN collection. A mood image helps explain the direction; it rarely defines a production finish on its own.
Mark the pieces that will be seen together. A desk return touching the main worktop needs a closer visual relationship than a lounge table on another floor. Cabinet doors arranged in one continuous run also deserve attention as a group.
We separate the discussion into three practical decisions:
- Matching surfaces: parts intended to share an approved material and appearance, such as adjacent desktops.
- Coordinated surfaces: different materials selected to work together, such as a woodgrain top and a painted frame.
- Intentional contrasts: darker storage fronts, upholstery or accents that should remain visibly different.
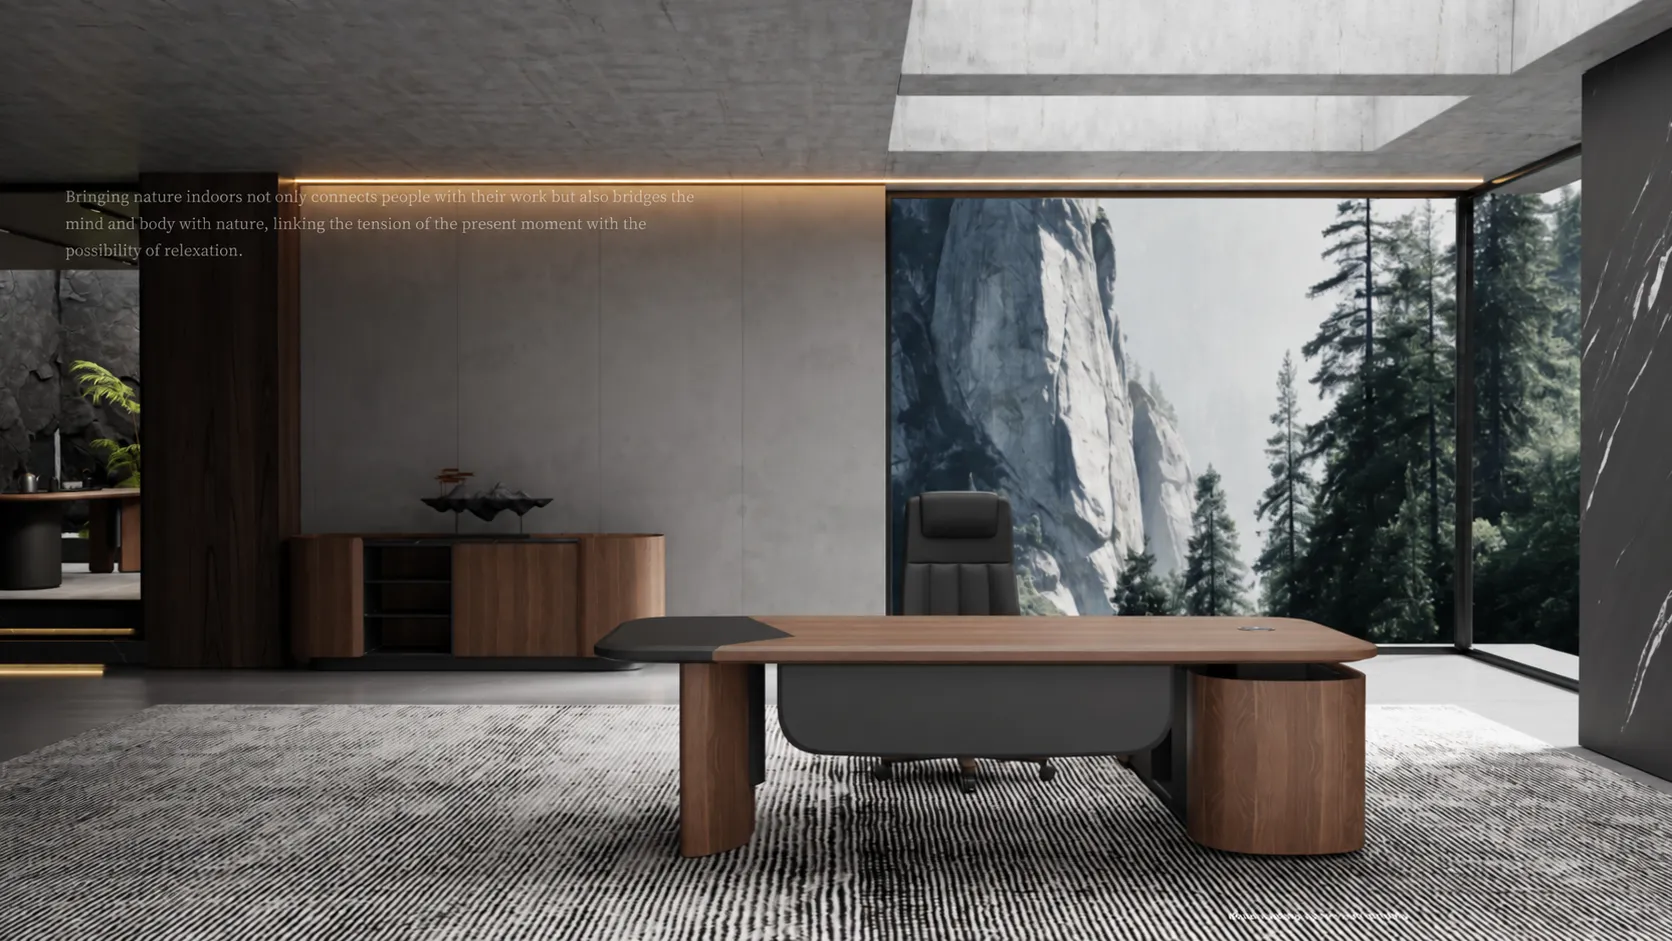
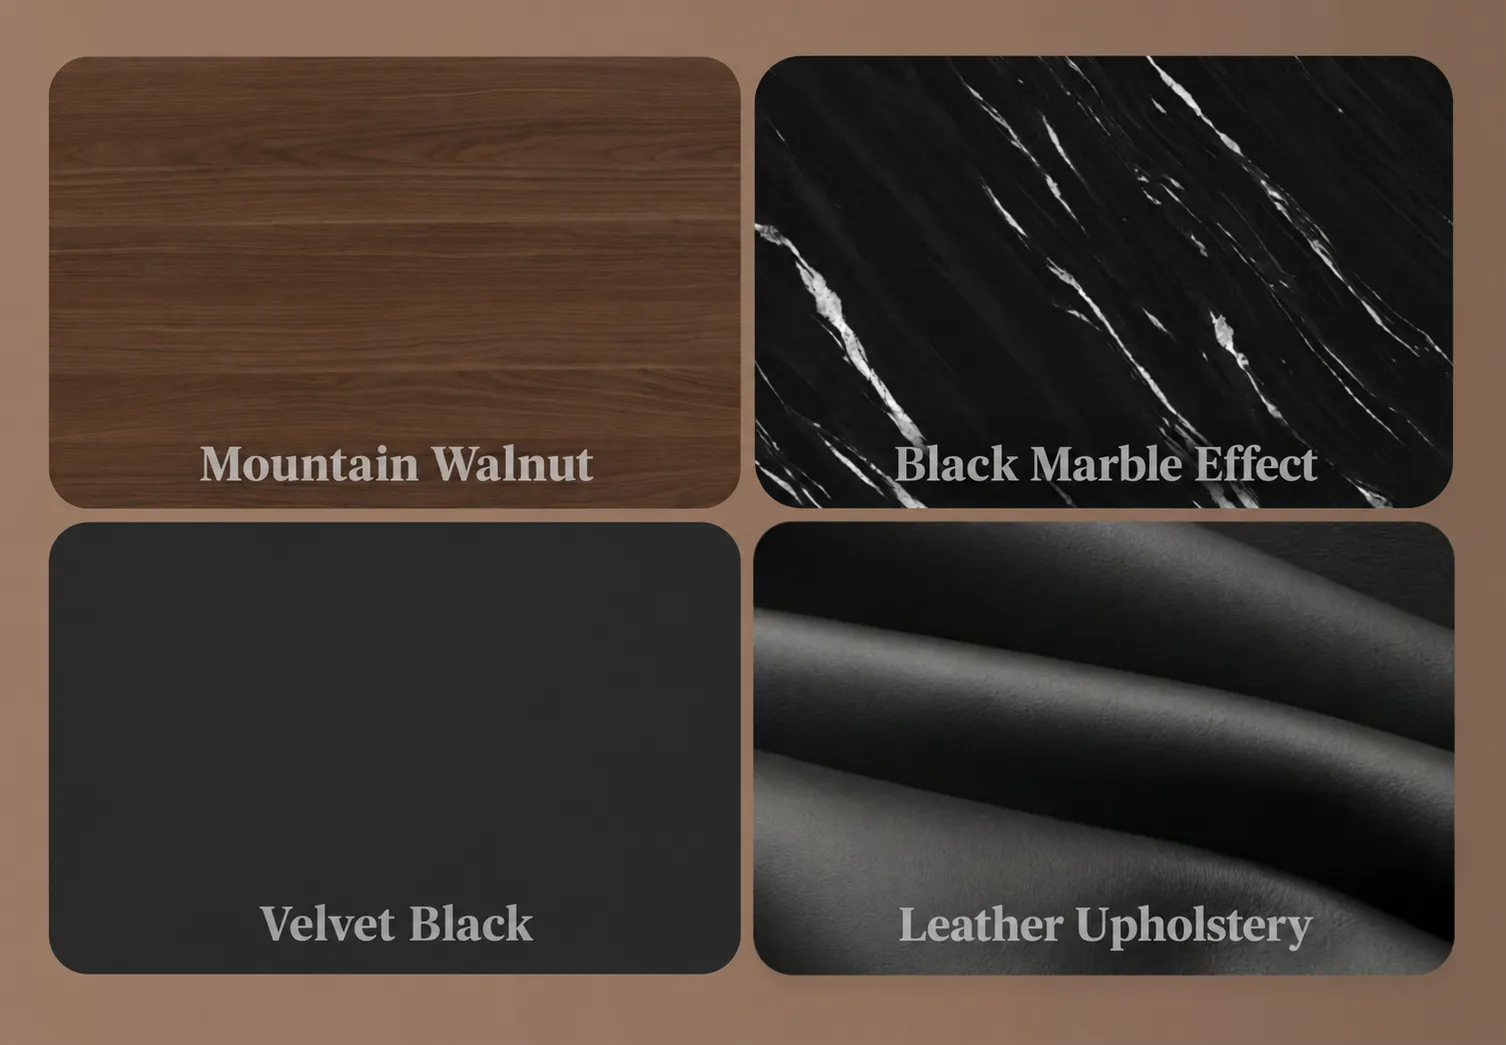
See the product and material details below. The executive desk and storage share a walnut tone, while the accompanying palette brings together black, a stone-pattern finish and an upholstery reference. These finishes give the collection a consistent visual direction without making every surface look the same.
2. Compare Materials, Not Just Color Names
“Walnut,” “grey” and “matte black” are starting descriptions. They do not establish the substrate, surface treatment, grain pattern or sheen. Two suppliers may use similar names for visibly different products.
For each selected finish, identify the actual material and its reference. Where different constructions are used across a project, assess them together before describing them as a match.
| Surface | What needs to be compared | What to record |
|---|---|---|
| Natural wood veneer | Overall tone, grain character, variation and coating appearance. | Veneer specification, finish reference and approved sample or sample range. |
| Decorative laminate or melamine-faced panel | Decor pattern, texture, sheen and its relationship to the edge. | Specified surface type, supplier/decor reference, texture and edge reference. |
| Painted or coated components | Color, gloss, texture and appearance on the intended material. | Color reference, coating specification and approved sample. |
| Fabric or upholstery covering | Color, texture and appearance next to the hard surfaces. | Supplier/article reference, color and approved swatch. |
The same brown tone on veneer and a printed woodgrain panel can look coordinated without reproducing the same grain. Natural veneer has variation; a decorative surface has its own designed pattern. If the two materials meet at an exposed joint, review that junction before approving them separately.
A named color standard can help communicate a solid color, but it does not define the entire finish. A smooth painted panel and a textured metal component can reflect light differently. Where a close match matters, compare physical samples made with the proposed materials and processes.
Material selection also has to suit the furniture’s use. Confirm the relevant cleaning instructions and any required performance evidence for the proposed surface. A visual match alone does not establish resistance to wear, stains or cleaning products.
3. Resolve Grain Direction, Edges and Small Components
A finish can be correct on the material list and still look inconsistent after assembly. Grain direction is one reason. A long desktop, its return and the cabinet beneath it may show the same decor in different orientations. These details also belong in the drawing review. See how we develop custom office furniture from client drawings.
Show the intended direction on the relevant drawings. For a multi-part meeting table, identify the panel arrangement and joints. If continuous grain across adjoining parts is part of the design intent, discuss feasibility and material selection explicitly; ordering the same finish does not automatically provide it.
Approve the edge with the face
The edge is visible from a seated position and at the end of a desk run. Compare its tone, texture and sheen with the face material. Include the edge profile, thickness and corner treatment in the product specification.
A flat swatch cannot show the full result. Where the edge is a prominent feature, a sample incorporating the face and finished edge gives the buyer more useful information. Review the joint line and transition as well as the color.
Include the smaller visible parts
Handles, cable covers, modesty panels, leg sections and exposed brackets can interrupt an otherwise consistent palette. List the visible components that matter to the design instead of treating “black hardware” as a complete instruction.
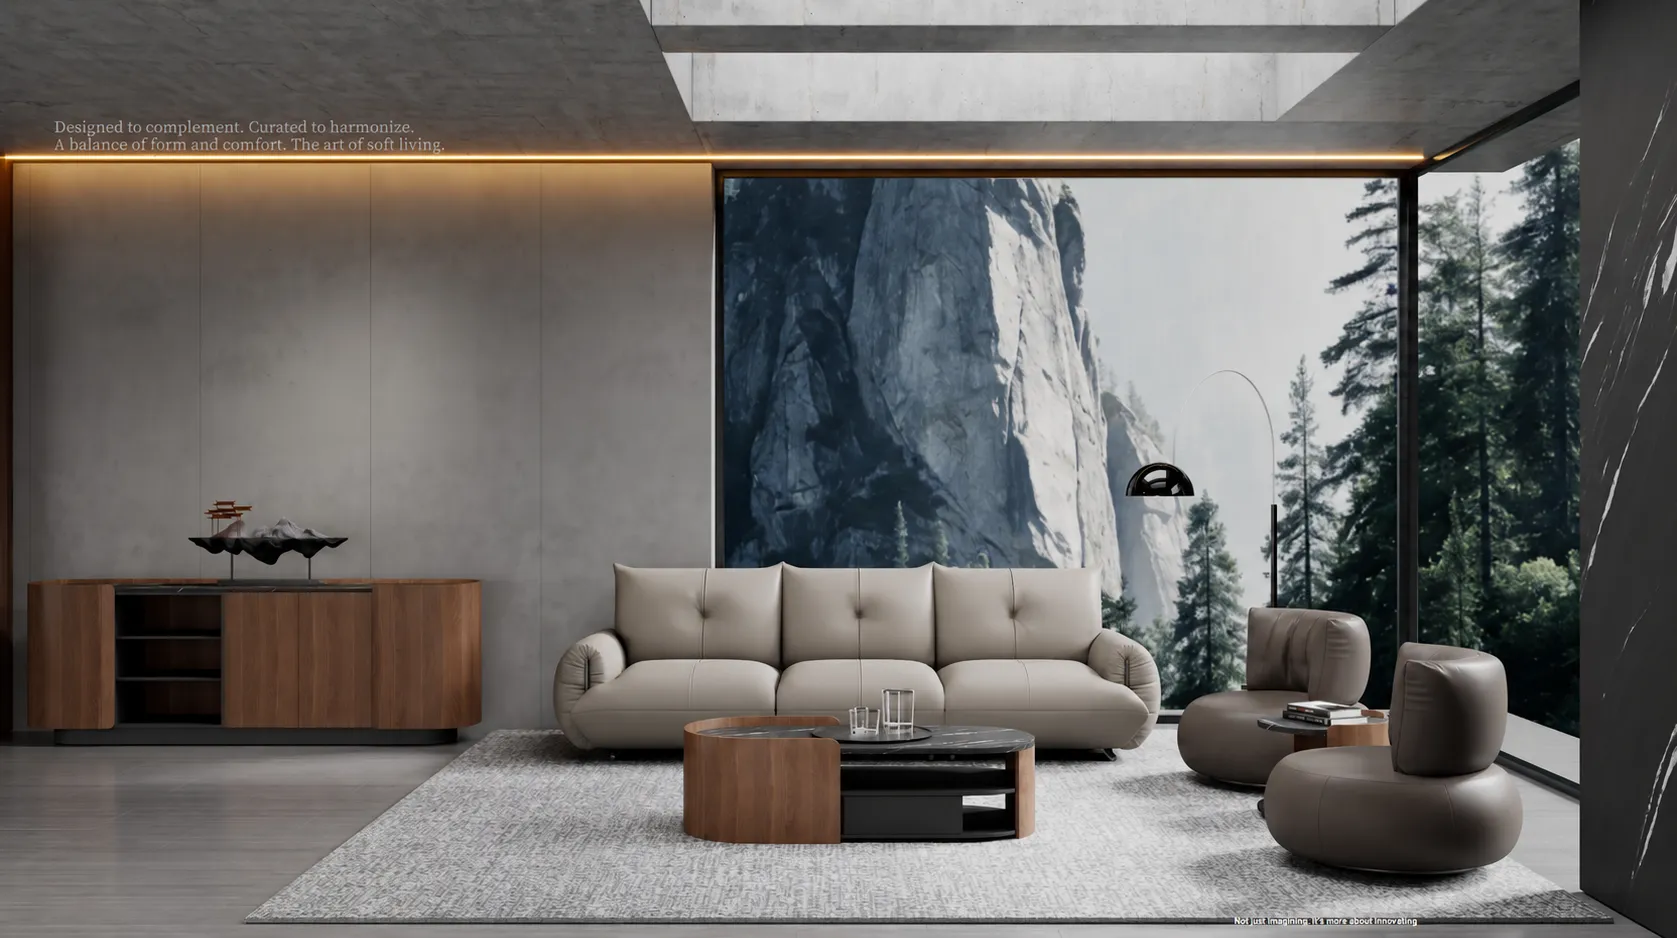
Seating and lounge furniture need the same attention. A shared wood tone can connect a storage cabinet with a coffee table while the upholstery introduces a softer contrast. The pieces should be reviewed as a group, even when their material specifications differ.
4. Review Physical Samples in the Intended Lighting
Use catalogue images and renderings to narrow the options. Use physical samples to make the finish decision. Screens, photography and printed pages can change the apparent color and hide differences in surface texture.
Place the proposed samples together with the relevant flooring, wall finish or existing furniture. Compare them under daylight and the planned artificial lighting where possible. Keep the viewing conditions consistent when deciding whether two samples are acceptably close.
Also review the surfaces in their intended orientation. A horizontal desktop and a vertical cabinet front receive and reflect light differently. Turning both samples flat on a table can miss a difference that becomes visible in the finished room.
If the final site is not available, agree on representative lighting and viewing conditions for approval. Record those conditions with the sample decision. Photographs are useful for communicating comments, but they should not quietly replace the agreed physical reference.
For a project adding to existing furniture, send an identified physical reference when practical. If only photos are available, treat the first selection as provisional and agree how it will be checked before production.
5. Record an Approved Finish Schedule
A finish schedule connects each surface to a specific selection. It is particularly useful when a project combines several furniture ranges or when desks, cabinets and tables are ordered at different times.
The example below shows the level of detail to capture. The labels are illustrative project references, not FENLERN finish codes or an actual client order.
| Illustrative reference | Application | Approval information |
|---|---|---|
| F-01: primary wood finish | Desk tops and visible cabinet fronts | Material/decor reference; sample ID; grain direction by component; approved variation. |
| E-01: coordinating edge | Exposed edges of F-01 panels | Edge material, profile and thickness; sample showing the face-to-edge junction. |
| M-01: dark frame finish | Specified frames and exposed metal parts | Color, gloss and texture reference; approved coated sample. |
| U-01: upholstery | Selected seating or upholstered panels | Material/article and color reference; approved swatch; applicable products. |
Attach the product list and drawing revision to the schedule. Record who approved the selections and when. If the buyer changes a finish, identify every affected component; changing a desktop does not automatically change the cabinet, edge or cable cover.
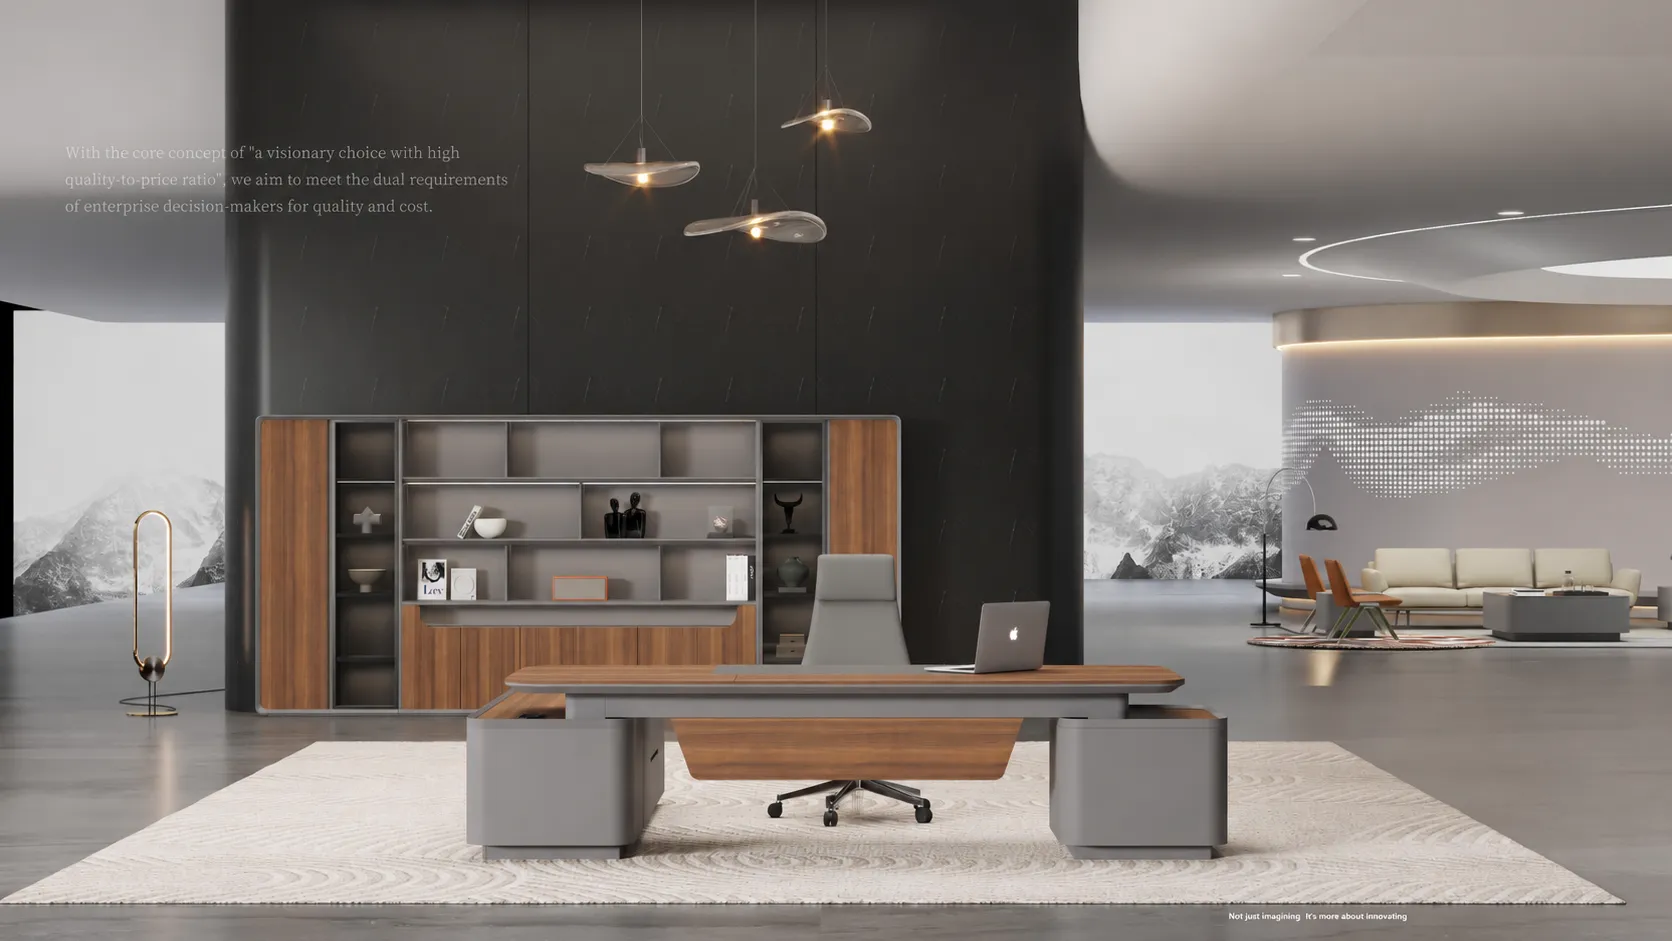
See the office furniture and matching material details below. This combination pairs a warm walnut tone with grey across the desk and storage. To carry that relationship into an order, identify where each finish will be used and connect it to the approved material sample.
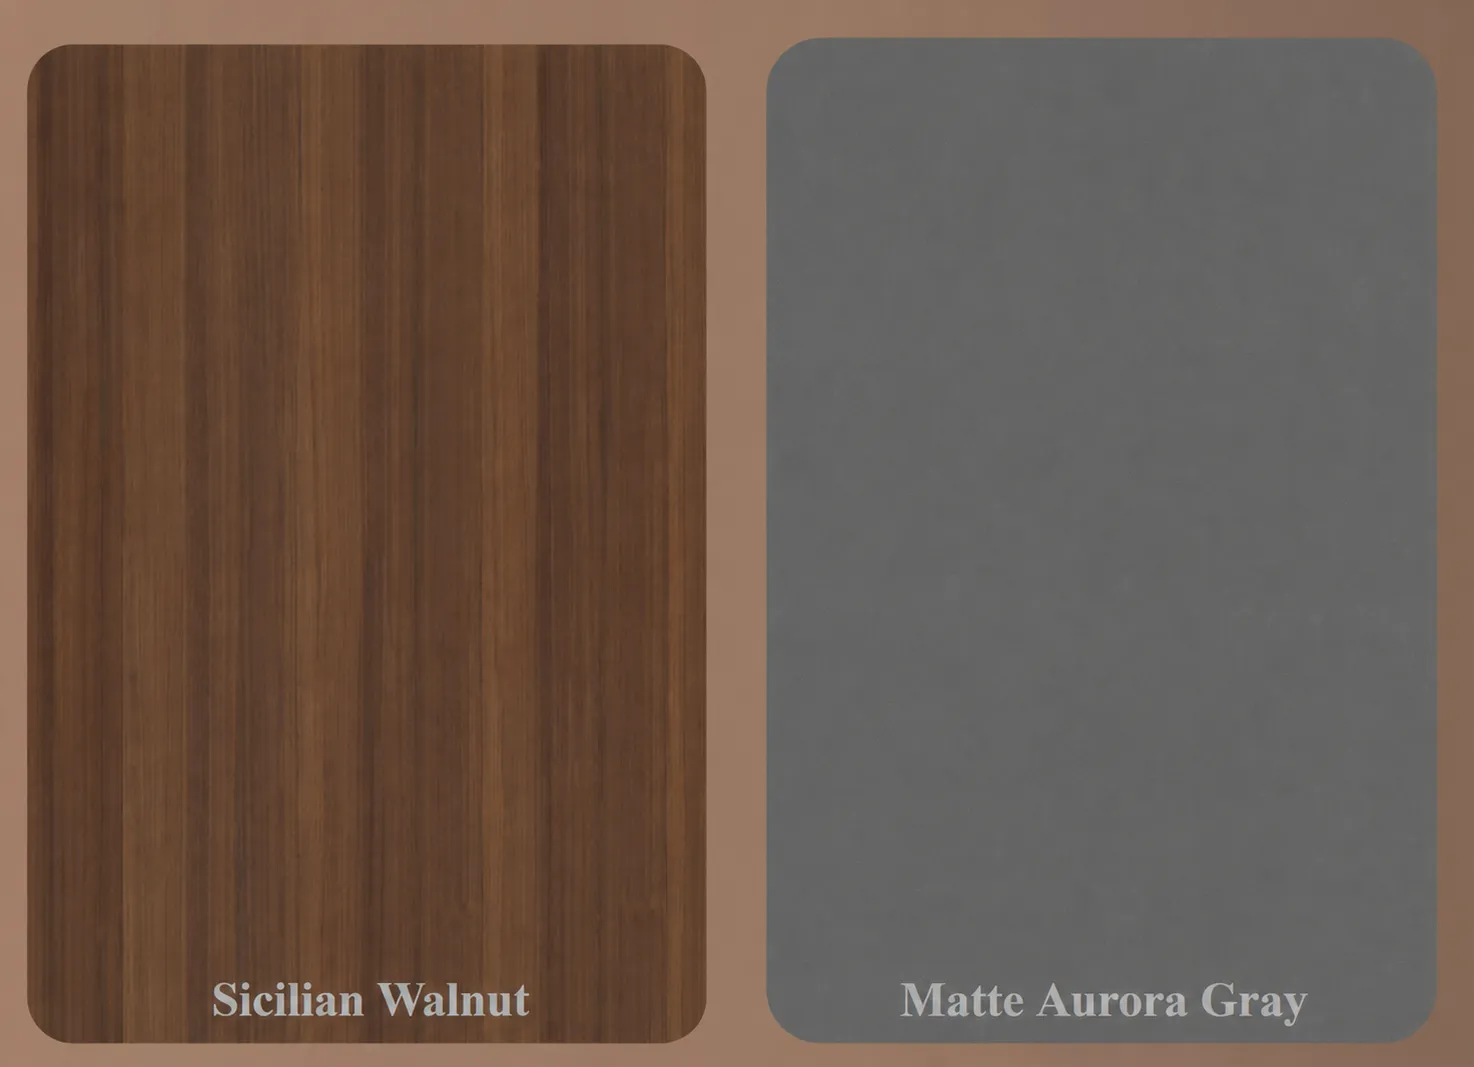
Agree what counts as an acceptable match
For natural materials, one small sample may not show the full expected variation. Discuss whether a larger sample or a range of samples is needed. For a mixed-material palette, state which surfaces require close color agreement and which have been approved as complementary.
If a project requires numerical color or gloss limits, the measurement method and limits need a separate agreement. Avoid inserting a universal tolerance into an order without checking that it suits the materials and the acceptance process.
6. Carry the Approved References into Production
Approval is useful only when the production information points to the same decision. The released specification should identify the finish references, current drawings and relevant sample records. Superseded options need to be clearly separated from the approved selection.
Agree the checks needed for the order, especially for highly visible groups of furniture. These may include comparing adjacent panels together, checking face-to-edge transitions and reviewing coated parts alongside the selected wood finish.
Checks should use the agreed references and viewing conditions. A difference noticed under a new light source needs investigation, not an automatic assumption that either the sample or the furniture is wrong.
If a material or component becomes unavailable, review the proposed alternative before using it. Similar color names do not establish equivalence. The change may affect appearance, performance, cost or timing, and the affected finish schedule needs updating once a decision is made.
7. Plan for Repeat Orders and Replacement Parts
For phased projects, keep the original order number, product references, finish schedule and approval records connected. “The same walnut as last year” leaves too much open to interpretation.
Confirm that the original material is still available and whether a new production batch needs review. Existing furniture may also have changed in appearance through light exposure, use and care. Matching the original sample and matching an aged cabinet are different requests.
For a replacement door or desktop, identify the part and the surfaces immediately beside it. A small difference can be more noticeable within a cabinet run than between separate furniture groups. Discuss the available options against the current furniture before committing to a replacement.
A retained reference makes this discussion easier, but it is not a promise that every future order will be visually identical. Planning the matching priorities at the first order gives later purchasing decisions a clearer basis.
Discuss Your Finish Requirements with FENLERN
Send the furniture list, drawings or reference images, quantities, and any existing material samples you need to match. Tell us which pieces will stand together and whether the project includes future phases. We can then discuss the material options and sample review needed for the proposed products.
For the wider development process, read Customized Office Furniture: From Design Brief to Production.
Questions About Custom Office Furniture Finishes
Can different furniture materials have exactly the same finish?
They can be selected for a close visual relationship, but color alone does not make different materials identical. Texture, grain and sheen need to be reviewed together. Agree the intended result using physical samples.
Is a finish name enough to place an order?
No. Connect the name to a material reference, product application and approved sample. Also identify the edge and grain direction where relevant.
Can FENLERN match furniture we already own?
Share the existing product details and an identified physical sample if available. The feasibility and degree of matching need to be assessed against the proposed materials and the condition of the existing furniture.
Do all pieces in an office need the same wood finish?
No. A coordinated palette can combine different finishes. The priority is to decide which pieces need close consistency and where a deliberate contrast supports the design.

